The job of a data recovery technician is to recover valuable data from a damaged disk. They’re essentially like restoration experts, except they’re restoring information rather than objects or other things. The best practice for both is to handle the object as little as possible when you’re working with it.For example, hard drives are like old documents written on parchment paper. When you’ve found something interesting in there and want to study it in depth, pulling the parchment out and setting it on your desk isn’t wise – you risk damaging something big in the process. Instead, you put it back the way you found it and create a new copy for study.The same idea applies to hard drives: when there’s a physical defect on it (e.g., read/write arm), each time someone reads or writes to a sector of the drive, more damage is done – so if you quickly open up that file before copying it and make contact with an unknown sector, those parts are gone forever because they can’t be recovered later on when success may be more possible. Thus, the first step in any data recovery attempt is to create an image of the disk where we don’t change anything but have read-only access – this image is safer than even reading.
Cloning Hard Drives with ddrescue
GNU ddrescue is a data recovery tool for disk drives, DVDs, CDs, and other digital storage media. It copies raw blocks of storage, such as disk sectors, from one device or file to another, while handling read errors in a n intelligent manner to minimize data loss by scraping good sectors from partially read blocks
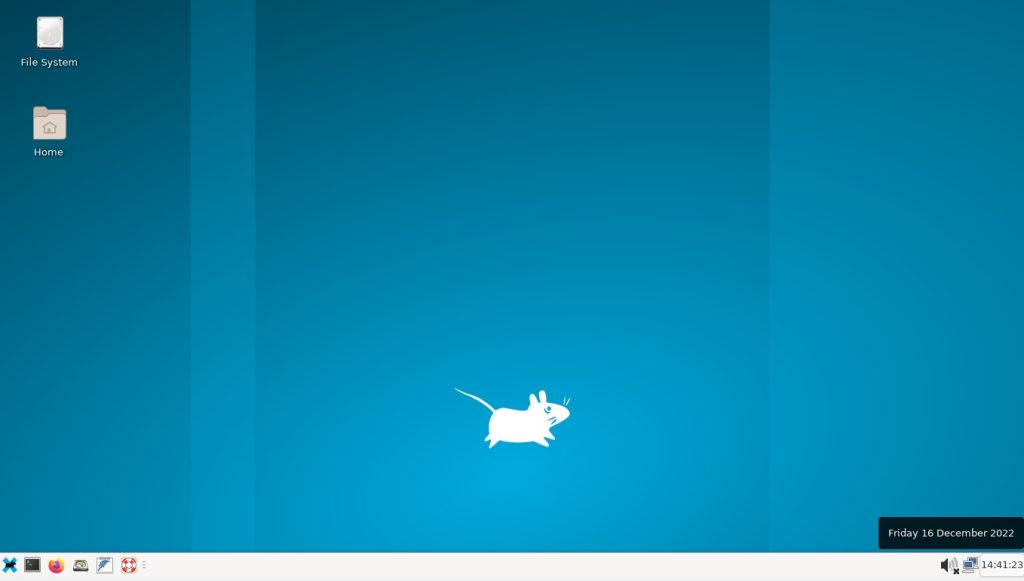
DDrescue runs as a command line tool that runs under Linux and can be run from you your favourite Linux version but I found it is easier to use the SystemRescueCD .SystemRescueCD allows you to place a bootable version of ArchLinux onto a usb stick, see the image below of the SystemRescueCD, this is essential if I need to go onsite to perform disk cloning.

The format of the ddrescue command is
ddrescue [options] infile outfile [logfile]
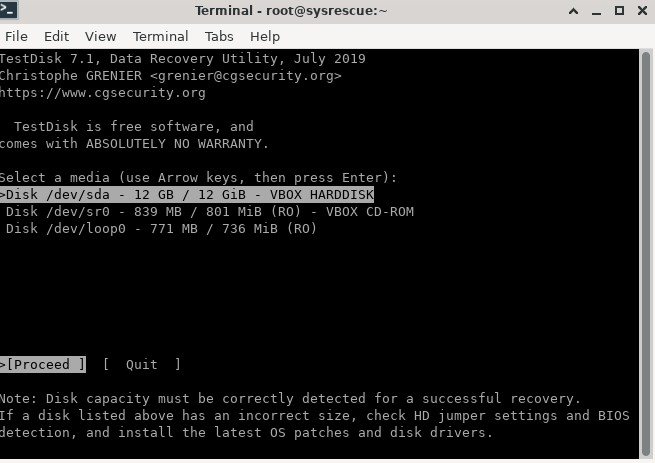
where infile and outfile are block devices on the system usually /dev/sda and /dev/sdb and we will be cloning from infile to outfile. To ensure we are cloning from the damaged drive to the healthy drive there is a command line utility on the SystemRescueCD called testdisk. This enumerates both the name of the block device and the make and of corresponding drive.

To run ddrescue, use the following format for commands:
ddrescue [options] infile outfile [logfile]
With SystemRescueCD, you can output a list of devices by typing fdisk -1 at the root prompt. Run the utility with the command switches/options included below in order to get a clone of the drive as safely as possible.
To image from disk to disk:
root# ddrescue -f -n /dev/[baddrive] /dev/[gooddrive] /root/recovery.log
Note: Many ddrescue tutorials recommend using the –rN component (which will cause it to try N times to rescue the block) in a second cloning pass in order to force the drive to read damaged/unreadable sectors. We recommend against using the –rN component, as damaged drives should be fully diagnosed by a professional to insure no further damage will occur by forcing it to read damaged areas. Forcing a malfunctioning drive to read damaged areas without first repairing it can cause further damage, resulting in irreversible data loss.
ddrescue Command Explained
Here’s an explanation of each of these components:
- -f Force ddrescue to run even if the destination file already exists (this is required when writing to a disk). It will overwrite.
- -n Short for’–no-scrape’. This option prevents ddrescue from running through the scraping phase, essentially preventing the utility from spending too much time attempting to recreate heavily damaged areas of a file.
- /dev/[baddrive] Identifies the source drive that will be copied. Fill this in with the name of your bad drive.
- /dev/[gooddrive]or /root/[imagefilename].img Identifies the destination drive or image file where the data will be cloned. Fill this in with either the name of the good drive or the image file name of your choice.
- /root/recovery.log This creates a logfile, which is essential if you’re performing multiple passes. You can name the logfile anything. Without a logfile, you can’t make additional passes on areas of your disk with bad sectors.
Some other useful command options for the process include:
- -r3 Tells ddrescue to keep retrying damaged areas until 3 passes have been completed. If you set ‘r=-1’, the utility will make infinite attempts. However, this can be destructive, and ddrescue will rarely restore anything new after three complete passes.
- -D Short for ‘–synchronous’. This issues an fsync call after every write.
- -d Short for ‘–delete-if-done’. Deletes the given logfile “if all the blocks in the rescue domain have been successfully recovered.”
- -e [+]n Short for ‘–max-errors=[+]n’. This sets the maximum number of error areas allowed before ddrescue gives up, and it can be used to prevent the utility from running infinitely.
- -v Short for ‘–verbose’. This sets “verbose” mode, providing additional details. Can be useful for diagnosing issues.
- -S Short for ‘–sparse.’ This compels ddrescue to use sparse writes — blocks of zeroes aren’t allocated on the disk, which can save space. However, it can only be used for regular files, and it is not an available option on all operating systems.
Cloning the damaged drive has a number of benefits. First and foremost, you don’t cause any further damage to the original hard disk. Cloning a disk performs damage control, putting an end to any further degradation or loss of data. Secondly,ddrescue with it’s enhanced techniques can recover sectors that operating systems cannot thus improving are chances of data recovery.
You could also clone the drive to a disk image however this not always feasible as large , eg 4tb drives are just too big however when clone by creating an image there are benefits., you only have to do this once. Lastly, disk images are more portable. Rather than physically removing the hard drive and attaching it to another computer, you can simply load the disk image onto a removable storage device or access it via a network connection.
Bottom-line: Your first step when recovering data from a damaged hard drive should always be to clone the disk. For more info about are Data Recovery Services.
Some of our Reviews
REQUEST A QUOTE
Address
126 Whatley Crescent Maylands
call:(08) 6180 6959
126 Whatley Crescent
6 Days a week from 8:00am - 5:00pm
